Getting Started
The PRO-LINK®+ diagnostic tool is a specialized commercial heavy duty vehicle diagnostic solution that combines information with test instrumentation to help you diagnose symptoms, codes, and complaints quickly and efficiently. There are two main components to the system:
| ● | Diagnostic Tool—central processor and display for the system |
| ● | Communication Interface Module —wireless vehicle communication module |


| 1. | Power Button |
| 2. | Shortcut (S) Button (special functions) |
| 3. | USB-C Jack (Charging port / multi-function) |
| 4. | USB-A 3.0 Jacks (2x) |
| 5. | Microphone |
| 6. | Battery Charge Level Indicator LED |
| 7. | Capacitive Touch Screen |
| 8. | Speaker (left/right) |
| 9. | Communication Interface Module (CIM) |
| 10. | Collapsible Stand / Carry Handle (see below) |
| 11. | Camera Lens |
| 12. | Stylus (in storage dock, also see below) |
| 13. | Battery Pack |
Stylus / LED Flashlight

Collapsible Stand / Carry Handle

AC Power Supply/Charging Adapter (USB-C)

| 1. | On the back of the unit, tilt the stand up. |
| 2. | Slide the two battery locks outward. |
| 3. | Place the top of the battery in first, then tilt it down into it's seated position. |
| 4. | Slide the two battery locks inward, to lock the battery in place. |
| 5. | Press and release the Power button  located on top left-side of the unit to power up. located on top left-side of the unit to power up. |
For more information on the battery and power supply see, Battery Pack & Power Supply

| 1. | Turn on the diagnostic tool and allow the system to bootup, then allow the Diagnostic Suite to open. |
| 2. | Click the Wi-Fi icon in the System Tray. |
The wireless network connection window opens.

| 3. | Choose your Wireless Network from the list of available networks, then select Connect. |
A password is required when choosing a protected network.
Wi-Fi performance varies depending on your wireless network equipment and ISP.
After powering up the unit and allowing it to boot up, the desktop screen displays.

To start the diagnostic suite and access the Home screen, double click the desktop  icon.
icon.
The PRO-LINK+ logo screen  displays, then the Home screen.

The Home Screen
From the Home screen you can:
| ● | Access the toolbar at the top of the screen (see below) |
| ● | Begin to Scan a Heavy Duty or Light Duty vehicle. |
| ● | View a list of Previously Connected Vehicles and view their session history data |
| ● | Change the wireless vehicle connection mode setting |
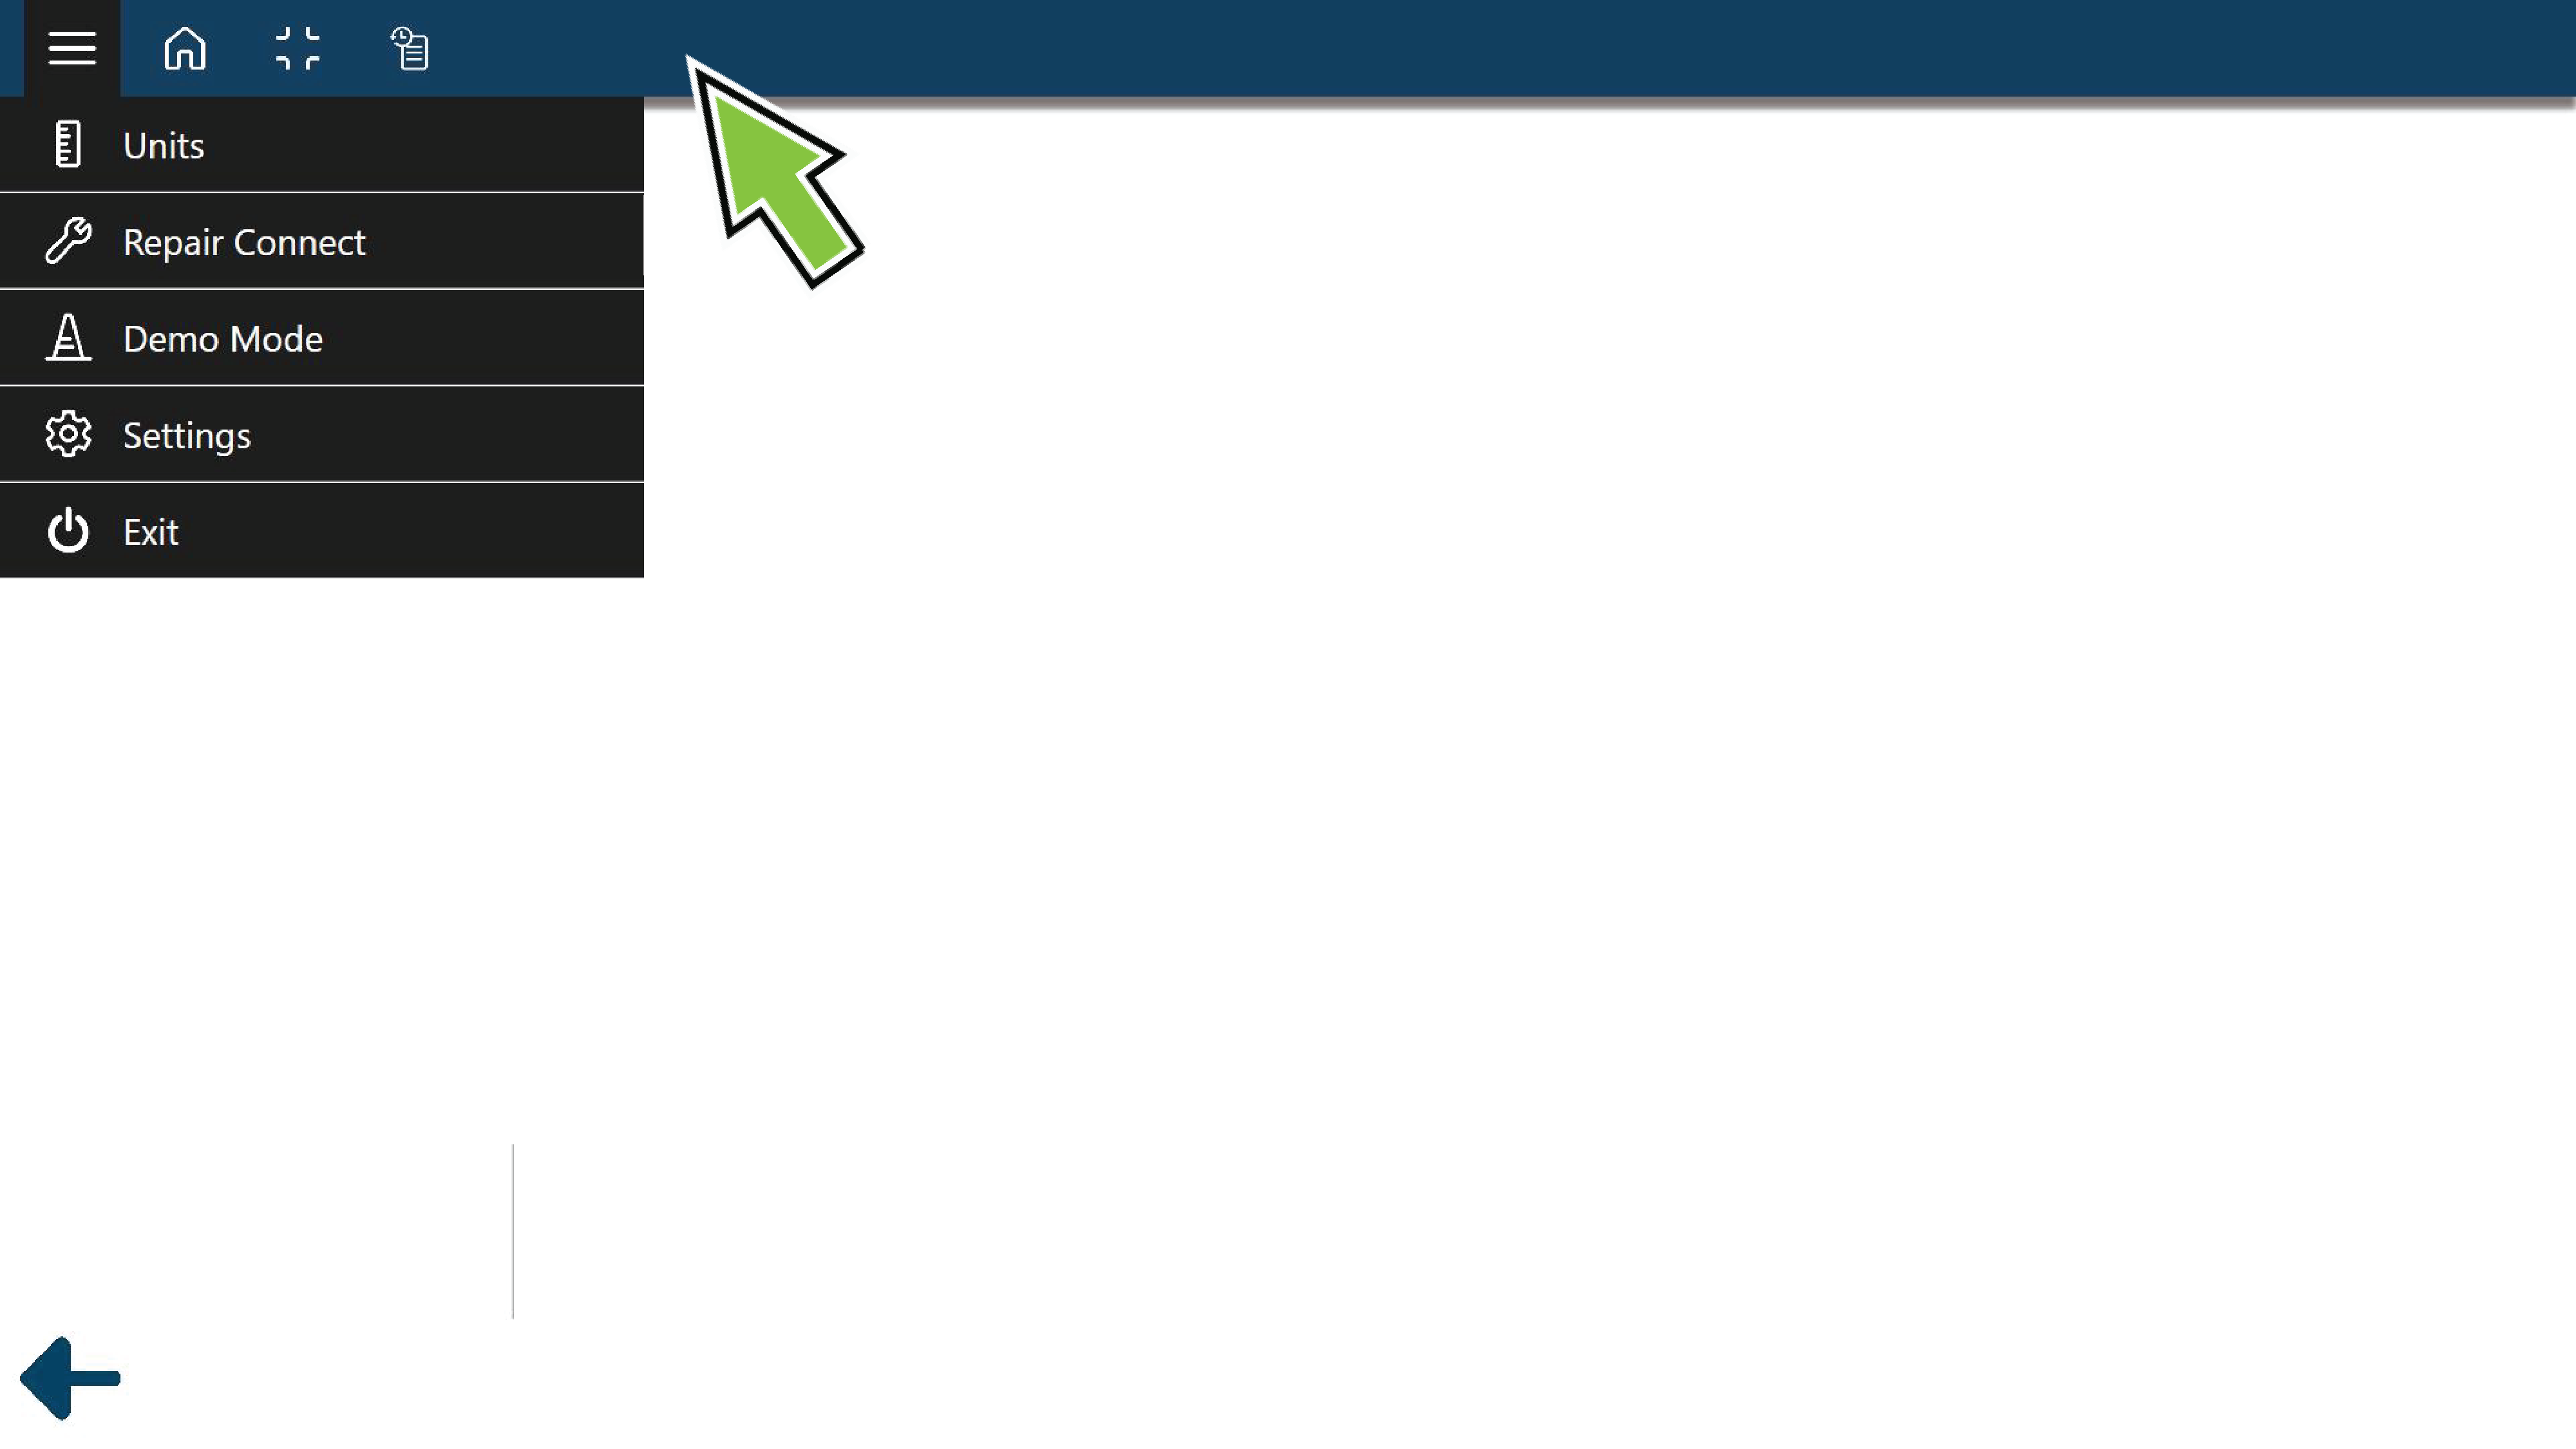
| ● | Open the main menu (see below), options include: |
| – | Units Setting - Set the system display setting (English/Metric) |
| – | RepairConnect - Open the RepairConnect feature |
| – | Demo Mode - Start the application in Demonstration Mode |
| – | Settings - Open the Settings Menu |
| – | Exit - Close the application |
Toolbar
The toolbar at the top of the screen is always displayed, however the visible icons are dependent on the active application.
The Back  button allows you to go back to the previous screen.
Toolbar Icons
| ● |
 Menu - Opens the main menu Menu - Opens the main menu |
| ● |
 Home - Returns to the Home screen Home - Returns to the Home screen |
| ● |
 Screen Display - Toggles the main window on the desktop Screen Display - Toggles the main window on the desktop |
| ● |
 Vehicle History - Displays a history view of previously connected vehicles Vehicle History - Displays a history view of previously connected vehicles |
| ● |
 Record - Starts a recording of parameters from a system module Record - Starts a recording of parameters from a system module |
Main Menu
To access the Main Menu, from the toolbar select the Menu icon.
Menu options are dependent upon active vehicle session status.
Menu Options - In an active vehicle session

| ● | View Vehicle Specs - Vehicle and module specifications for active vehicle |
| ● | Log Notes - Enter and view log notes for the active vehicle |
| ● | Create Report - view a session report for the active vehicle |
| ● | Units - Change the system display units of measure (English/Metric) |
| ● | RepairConnect - Open the RepairConnect feature |
| ● | Settings - Opens the Settings menu |
| ● | Disconnect - Stops communication with the active vehicle |
| ● | Exit - Exits the diagnostic software |
Menu Options - Not in an active vehicle session

| ● | Units - Change the system display units of measure (English/Metric) |
| ● | RepairConnect - Open the RepairConnect feature |
| ● | Demo Mode - Starts the application in Demonstration Mode |
| ● | Settings - Opens the Settings menu |
| ● | Exit - Exits the diagnostic software |
| 1. | Connect the Communication Interface Module (wireless interface), using the applicable adapter (if needed) to the vehicle's diagnostic connector. For additional information, see Connecting the Wireless Communication Interface Module. |
| 2. | Select the vehicle type, Heavy Duty or Light/Medium Duty from the Home screen. For additional information, see Scanning a Vehicle. |
Software updates are provided via Wi-Fi.
| 1. | To check for software updates, first ensure the unit is connected to Wi-Fi, see Wi-Fi. |
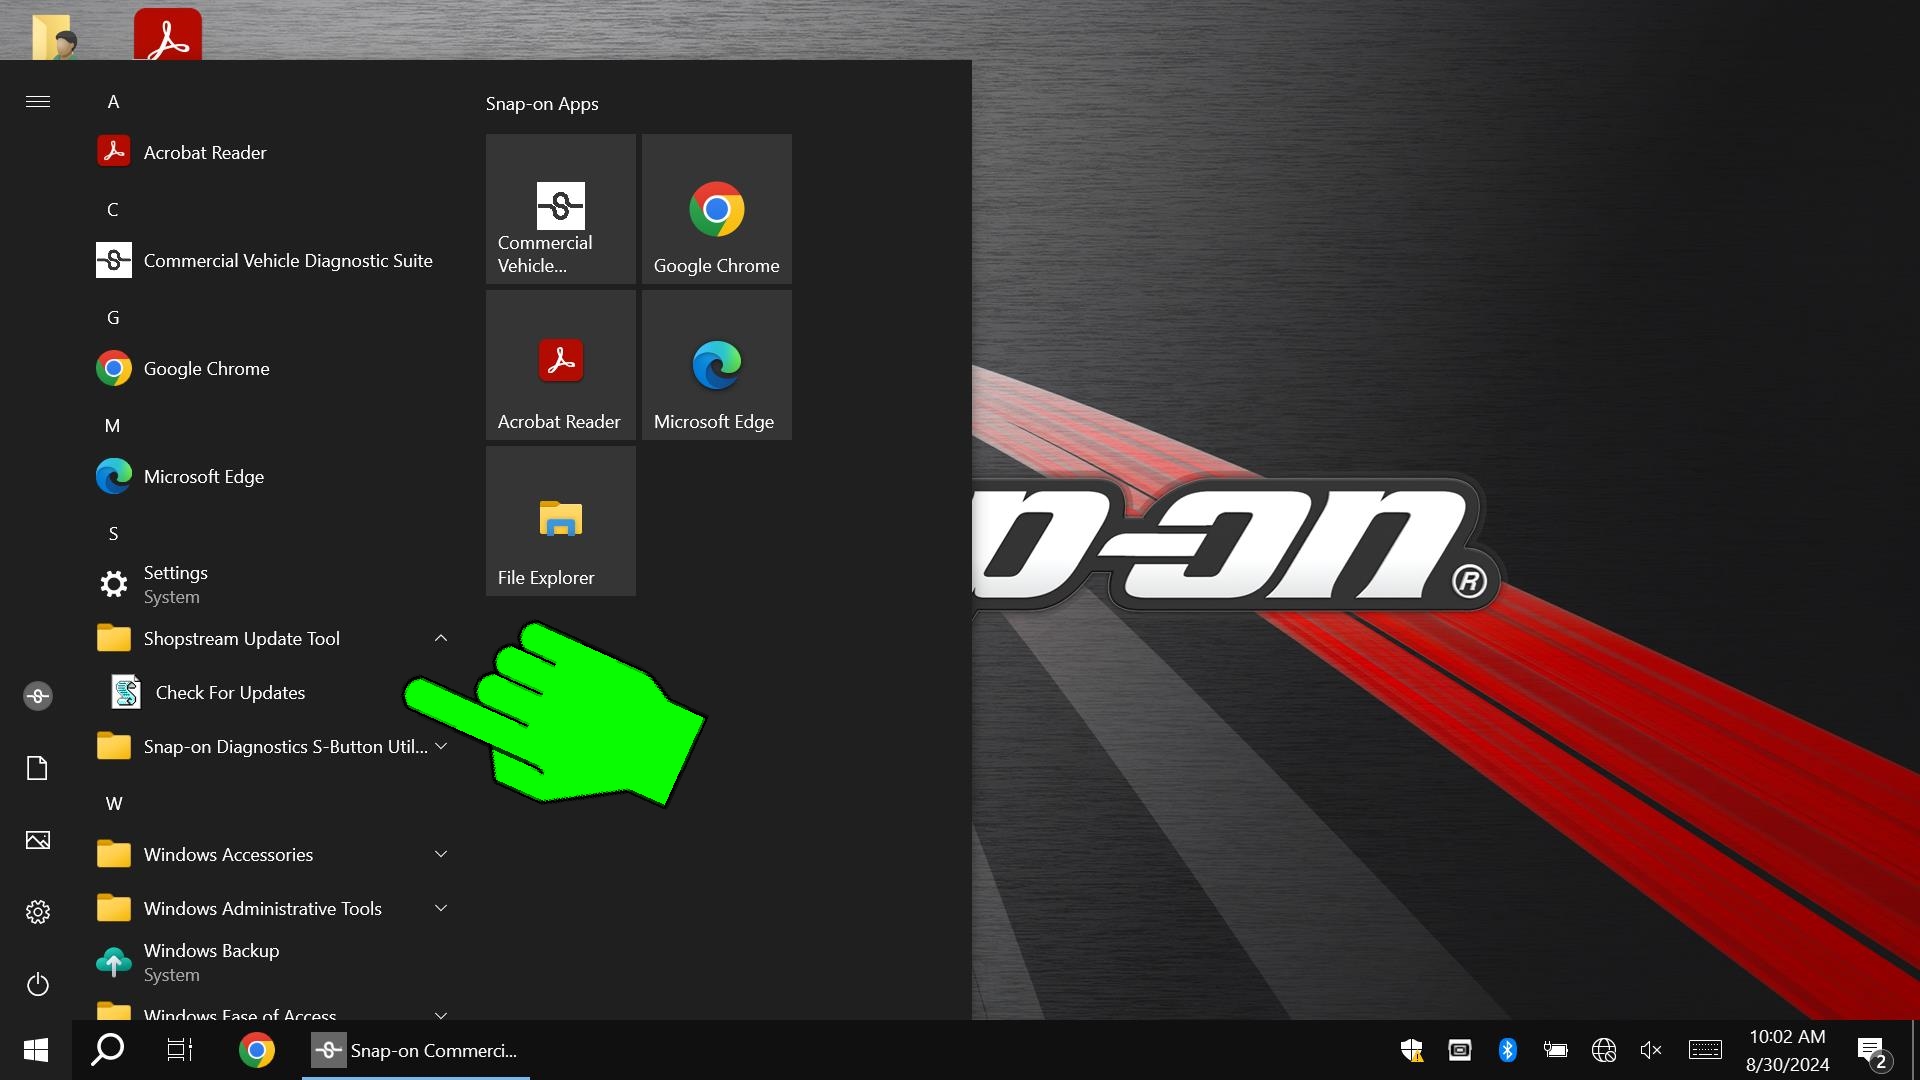
| 2. | Click the Software Update icon in the taskbar, or select ShopStream Update Tool >Check For Updates from the system menu. |
| 3. | If an update is available and not already downloaded, choose to Download Now. |

| 4. | Once the download completes, choose Install Now (or you can choose to install it later). |

| 5. | Follow the screen prompts to install the update, then restart the diagnostic software. |


